Wednesday, August 31, 2011

Table Fable

Well, not really a fable. There are no lesson-learning animals or anything, but it rhymed, and I like a rhyme.

So, I showed you my little plasticky, grime-coated orange chairs. When I positioned them in Graham's room, the only place they'd fit--under the window beside his bed--required moving his toy box (which also functions as a bedside table) somewhere else, which meant moving his bedside lamp, unless I could find a little table to squeeze in between the chairs. Whew, run-on sentence! Are you still with me?

Anyway, I needed a tiny table in somewhat of a drum shape, one that would come in a bit in the middle to allow clearance for the chairs. Every centimeter matters in this tiny bedroom. In my head I wanted something kind of like a mini Saarinen tulip table, but oh, my God, seriously? Six HUNDRED dollars for a kids' table?


Um, I didn't spend six DOLLARS on the two chairs to go on either side of it? Oh, but wait! You can get the kids' version of the oval tulip table (you know, for craft time or Legos or scraping boogers out from under--sorry, just keepin' it real) for just $1519! That's one thousand, five hundred nineteen dollars. But they'll throw in free delivery, so it's really quite the bargain. I think it goes without saying that this table won't be coming to my humble home.

I liked the looks of the Sasha Stool from Italia Modern, and when I was pricing it, it seemed reasonable at $39.99 (it's since gone up on Amazon).
It had the right hourglass shape, it's made of durable plastic, and it could double as a stool (I always appreciate double-duty furniture). One of the reviews even mentioned using it as a shower stool, which I thought was clever. But after shipping, the cost topped fifty dollars. I'm not saying fifty dollars is unreasonable at all, but for something my crazy three-year-old is inevitably going to climb upon and hurl himself from, I thought I could do better.

I looked around at eleventy million online shops and blogs, and then I just Google-image searched "drum stool" and "barrel stool," among other shapes that seemed similar to what I wanted. The results, however, included a stool from Crate and Barrel. Well, looky here:

Cute! Strong enough to be a stool, and according to the reviews, a great height for a side table! Also? UNDER SEVENTEEN DOLLARS. FIVE PERCENT of the cost of the first one. I know, I know--one's iconic and sculptural and the other is mass-produced and blah blah blah. But again, let's review:
  • kid's room
  • hurling and jumping
  • boogers (Graham is really quite considerate with his boogers, wiping them in tissue and putting them in the waste basket, but he does sometimes insist on showing them to me first. Ah, boys.)

The Flamingo Stool is on its way to my house as we speak, and I'm really excited to see how it works in the space. And you know what? If it doesn't work in Graham's room? We can use it somewhere else. Even if we only use it for extra seating the 2.1 times per year that someone visits us, that's okay. Because it was $16.95, yo.


Pin It

Tuesday, August 30, 2011

Plastic Fantastic (nothing rhymes with orange, so . . .)


This all began when Seth and I took Graham to a birthday party at one of those crazy, inflatable, bounce-overload places. Seth walked Graham in, and I stayed in the car to feed Dean. My eye began to wander along the sidewalk of the strip mall where the bouncy place was located, and I spotted a Goodwill. Sitting on the sidewalk in front of Goodwill were some grimy-but-cute chairs, the molded plastic kids' kind.

They were pretty gross, but they were cheap, so I hauled the baby over there, bought the chairs, and maneuvered the stroller back to the car while carrying two chairs. (Side note: I am determined not to buy a new minivan or SUV, but damned if it's not hard to fit two adults, two carseated kids, and ANYTHING ELSE into a Honda Accord).

Somehow we got them home (I think one fit into the trunk, and I had to hold one, upside down, in my lap). Yep, still grimy.


But again, super cheap:


I busted out the soap and water, followed by my beloved Magic Eraser and some elbow grease. After that, they looked . . . slight less grimy? But I like them. I knew I wanted to put them in Graham's ever-so-slowly-coming-together room. We're hanging maps in there with lots of orange in them, and he's outgrown the chair that's currently in there.


I also want to do something about these nastay legs--either spray paint them or take a Brillo pad to them and scour off all the remaining peely black paint. But I'm excited to show you how they'll look in Graham's room.


Pin It

Friday, August 12, 2011

The Closest I'll Get to Sewing

Wow, what a total shock yesterday to find my hallway featured on Apartment Therapy! I totally felt like doing the "We're Not Worthy" dance from Wayne's World (and some of those commenters would probably agree, ha. But I can't say that I care. It's just a floor, folks). Anyway, welcome! If I got three new readers from that, then my subscribers have doubled!

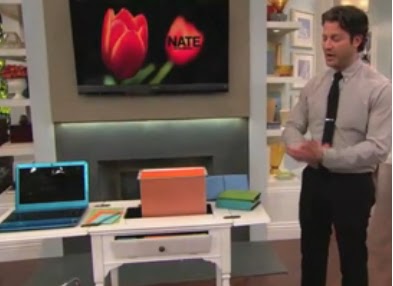
So. I am still working on happying up the hallway (remember, these things take eight years time), but my mental home-project checklist is very all over the place right now. I was hunting for picture frames at some neighborhood thrift stores last week, and I spied a super-cute sewing table. I haven't bought it (yet--I'm waiting for half-price day and hoping it's still there), but it reminded me of this genius idea I saw on the Nate Berkus show a while back:


The object of my affection is around 3/4 of the way through. Did you see it? (Smudgy screencaps to follow, but if you've read this blog for any length of time, you are no stranger to smudgy photos.)

Nate (or one of his production assistants) took this sewing table

And made it into this adorable, handy workstation!


When the little file box hinged and folded into the spot reserved for the showing machine, I squealed. (Seriously. I'm not proud of that.)

The whole thing folds up to a teensy little table that is just begging to go in my guest room..

The only problem is, I gave up that guest room for Kid #2 (gah, babies are so selfish, taking away my extra decorating space and stuff). BUT! Seth and I just made a Very Big Decision to dig our heels in and stay in our teeny house in our beloved neighborhood. We decided that if we were going to live there a long, long time, we would invest in making it work for us. Last week, we closed on a refinance that will allow us to convert our unfinished attic into a master suite (waaaaay more to come on this, whether anyone wants to hear about it or not).

After I got over the initial shock and delight that we would have TWO bathrooms, and that my closet would actually be in the SAME ROOM as my bed AND would be larger than a phone booth, I also realized that our current bedroom (and its miniature closet) would be all freed up! The return of the guest room! Well, we typically have two guests per year (hi, Marianne), so it will be used for a little more than that--probably a combination guest room/office/playroom/place to pass out when the kids wake us up in the middle of the night. But I have already been dreaming of what to do with it. There may have been Orla Kiely fabric purchased.

I'm adding this little sewing table project to the Adorably Decorated Guest Room in My Head. Pin It

Wednesday, August 3, 2011

Walkin' on Sunshine

Ah, everything always seems so simple in the beginning, doesn't it? Before the third coat of primer, and the fourth re-application of tape? And the running out of tape? And the incorrect combinations of oil and latex paint, in an attempt to save money? And the yelling at the husband and son that "NOBODY GOES TO THE BATHROOM FOR ANOTHER HOUR!" Ah hahaahhaa haaa HA.

Anyway, it turns out that no, it's not easier to use the natural pattern of the floor, and that yes, stencils would have been a hell of a lot easier. But, after approximately 31 coats and nine hours of my life, there was no turning back.

First, I painted a couple different stripes with primer, just to see which width I preferred. After I decided on the narrower stripe, I marked off those widths down the length of the floor with sharpie.


Then I thought I would "paint" alternating zigzags so they would show through the primer, helping me keep track between coats.

Then I primed over those zigzags. They showed through as I hoped they would.

Then I planned to paint the white zigzags over these primer stripes, tape off the rest, and fill in the empty stripes with a marigold color. But using a brush wasn't giving me the smooth result I wanted, so I did the thing I'd been trying to avoid the whole time: taping everything off.

At this point, I was so hunched over from putting down tape that I looked like this:

And because of that, and because I was honestly loving the Painters Tape Blue with the white, I suggested that we just polyurethane over the floor as-is and be done with it. But I couldn't convince anyone else of this. (Will someone else paint their floor blue and white for me? Because I really, seriously love it.)

Then, nine hundred more coats of white (which messed up my pretty blue chevrons). In an effort to save money, I used some semi-gloss latex that we already had--Behr Elegant White. This is what's on all the trim in our house.


Then MORE taping (and my second tearful apology to my husband for "always messing with everything like this. But I just want things to be pretty."

And three coats of yellow paint, FOUR rolls of painters tape, and countless leaps from our bedroom doorway to the vent cover to the bathroom door later, I'm done. Kind  of.


I have lots of touching up to do, I need to paint that return vent white (I think?), I need to coat the whole mess with a layer of polyacrylic or polyurethane or something, AND I need to put quarter round trim on. But the hallway is already so much lighter, brighter, and happier.

And now for some good ol' before-and-after (well, before and during?) action.

I'm also hoping to get a real, non-prison-issue light fixture and hang some photos and artwork, but let's remember that this part took me a year (well, eight years since we bought the house), so let's be realistic.
Pin It

Thursday, July 28, 2011

Slightly Less Miserable

Well, I shared my disgusting Hallway of Sadness a while back a YEAR AGO. And then I hemmed and hawed over which  stencil to choose, and then I was too cheap to buy the one I wanted. AND THEN I decided, why buy a stencil, when painter's tape is so much cheaper, and stripes only require tape and patience?

I mean, that is a good-lookin' floor. Via Little Blue Chairs. 
I was looking at my nasty ol' fake parquet floor, trying to decide how far apart to space the stripes, what colors, etc., when it occurred to me that the parquet pattern would lend itself to something kind of awesome.


Do you see it? No, not the filth and sadness; the pattern that finally jumped out at me. Let me back up a bit.
I am fully on board the chevron/zig-zag love train. Half of my pins on Pinterest reflect this.

From Chez Larsson. Swoon.
 And I wanted to buy this Urban Outfitters light blue zigzag rug for Dean's nursery, but as with all things Urban Outfitters, it sold out in the thirty minutes between the time I first saw it and the moment I decided to purchase it.


So, when I was looking all cross-eyed, magic-eye-style at the Hallway of Shame, I was delighted (well, as delighted as one could be in the Pit of Despair) when this occurred to me:


Eh? EH? And would you believe, I am NOT a graphic designer? Seriously! I know--It's some sort of innate gift. Anyway, I know you thought there wasn't a way to make that hallway look sadder, unless some tool put Paint lines on it. But you get where I am going, I hope.

Then I consulted the wise and powerful Internets, because there is nothing new under the sun, and I knew someone would have already painted yellow and white zig zags/chevrons/Charlie Brown stripes/whatever the kids are calling them these days on a floor, and lo and behold this prettiness:


From Ish and Chi.

So yes. YES. Sign me up. I am sanding tomorrow, priming tomorrow night, and then making everyone leave the house on Saturday while I close off half of the rooms to paint these suckers. And hopefully by Monday (or perhaps  July 2012) I will have a new floor to show you. Pin It

Wednesday, July 6, 2011

Backyard Bowl-o-rama Birthday

I can't believe it's been almost a year since Graham's Mappy 3rd Birthday party, but in a couple months, my little guy will be FOUR. I still don't understand how that happened. While Graham still enjoys his maps, he's picked up a few more obsessions in the months since his third birthday--mainly bowling, Legos, and watching Monsters, Inc. over and over until I want to put my fist through a wall. So in preparation for birthday number four, I thought I'd explore the themes of bowling, Legos, and a more generic monster-themed party. First up: bowling!


I'm not sure how this obsession started. Graham received a toy bowling set for Christmas when he was two, and he liked it well enough. Somewhere along the way he rediscovered it, and in the process, he tried to make everything into bowling pins or bowling balls. For example, rolling a marble into crayons standing on end. Or rolling a lemon at Mommy's collection of postpartum medication bottles (saddest. game. EVER). As a potty-training reward recently, my mom and I took Graham to the actual bowling alley, and it seriously BLEW HIS MIND.


Most of the bowling alleys I've called limit groups to six bowlers per lane. That would get pretty pricey for a lot of kids; plus I'm not sure all of Graham's classmates can handle the bowling alley just yet. Instead, we'll be relying on the backyard again for our Backyard Bowl-o-rama.

Activities. I am not about to construct a replica bowling alley on my lumpy, weedy lawn, but I thought this giant inflatable bowling set would be a great game for the kids (and um, the adults too). I'm a little concerned that all of the reviews mention the kids inevitably growing bored of the bowling and using the giant pins to beat each other? Only a little, though.

We'll also hook up the Wii to my dad's giant old big screen (currently living in my basement, where my parents like to store things indefinitely), and play Wii bowling in the shady under-deck area.

Lastly, if the kids are enjoying beating each other with the giant bowling pins, maybe they'll enjoy beating this bowling pin pinata? I don't know. There are only so many things you can do with bowling balls and bowling pins, people.

Food: Graham's Snack Bar. I could go in one of two different directions with this, either copying food you'd normally see at a bowling alley snack bar (pizza, nachos), OR giving into my aforementioned disease and creating themey food just for the sake of its dorky naming opportunities. SUCH AS: ham and cheese PINwheels, SPARE ribs, TURKEY wraps, banana SPLIT bites, peanut GUTTER BALLS . . . Oh, I could go on and on. One thing I know I want to attempt are these bowling cake pops. Amazing!

Invitations and Decor. As I was digging around online for bowling party inspiration, this little gem popped up in my Google Reader. I am a sucker for red and aqua, so I will definitely be considering those invitations, as well as the one in my mood board, both from Just Click Print. I will keep dredging up the red and aqua, relying on my ol' reliable red paper lanterns, which will be reimagined this time as bowling balls. I'm thinking maybe I can tape some little black circle trios (holes!) to them? We shall see.

For favors, I like these mini bowling sets (you're welcome, parents! Enjoy stepping on those little gems!) or these clever bowling-themed crayons. Pin It

Tuesday, July 5, 2011

Fourth of July Fun


Have I talked before about how much I love my neighborhood? What we lack in grand homes we make up for in awesome neighbors and proximity to all kinds of fun stuff. Our location is the one reason my husband and I can't imagine selling our teeny-tiny house.

My sweet little street has the best traditions: a neighborhood Easter egg hunt, an annual Memorial Day kickball game, and what has to be the cutest of all: a 4th of July bike parade. We got the kiddos all decked out for the parade, and I decided to set up a little "tailgating" station under the giant oak tree in my front yard, for all of our family members who came to watch the parade.


I mostly just scrounged up things from around my house that were red, white or blue. I did splurge and buy a blue sheet at the thrift store (don't worry, I washed it!) for a whopping five dollars, and some little metal buckets from the Target dollar zone for my citronella candles. (Honestly? I think five dollars is a bit high for a used flat sheet. I don't know what that says about me.) I hung some red and white lanterns (leftover from other parties) from the tree branches, made a quick bunting out of some leftover scrapbook paper and ribbon, and called it a day. The family appreciated a shady spot to sit and some treats to enjoy in during the parade.


Pin It